
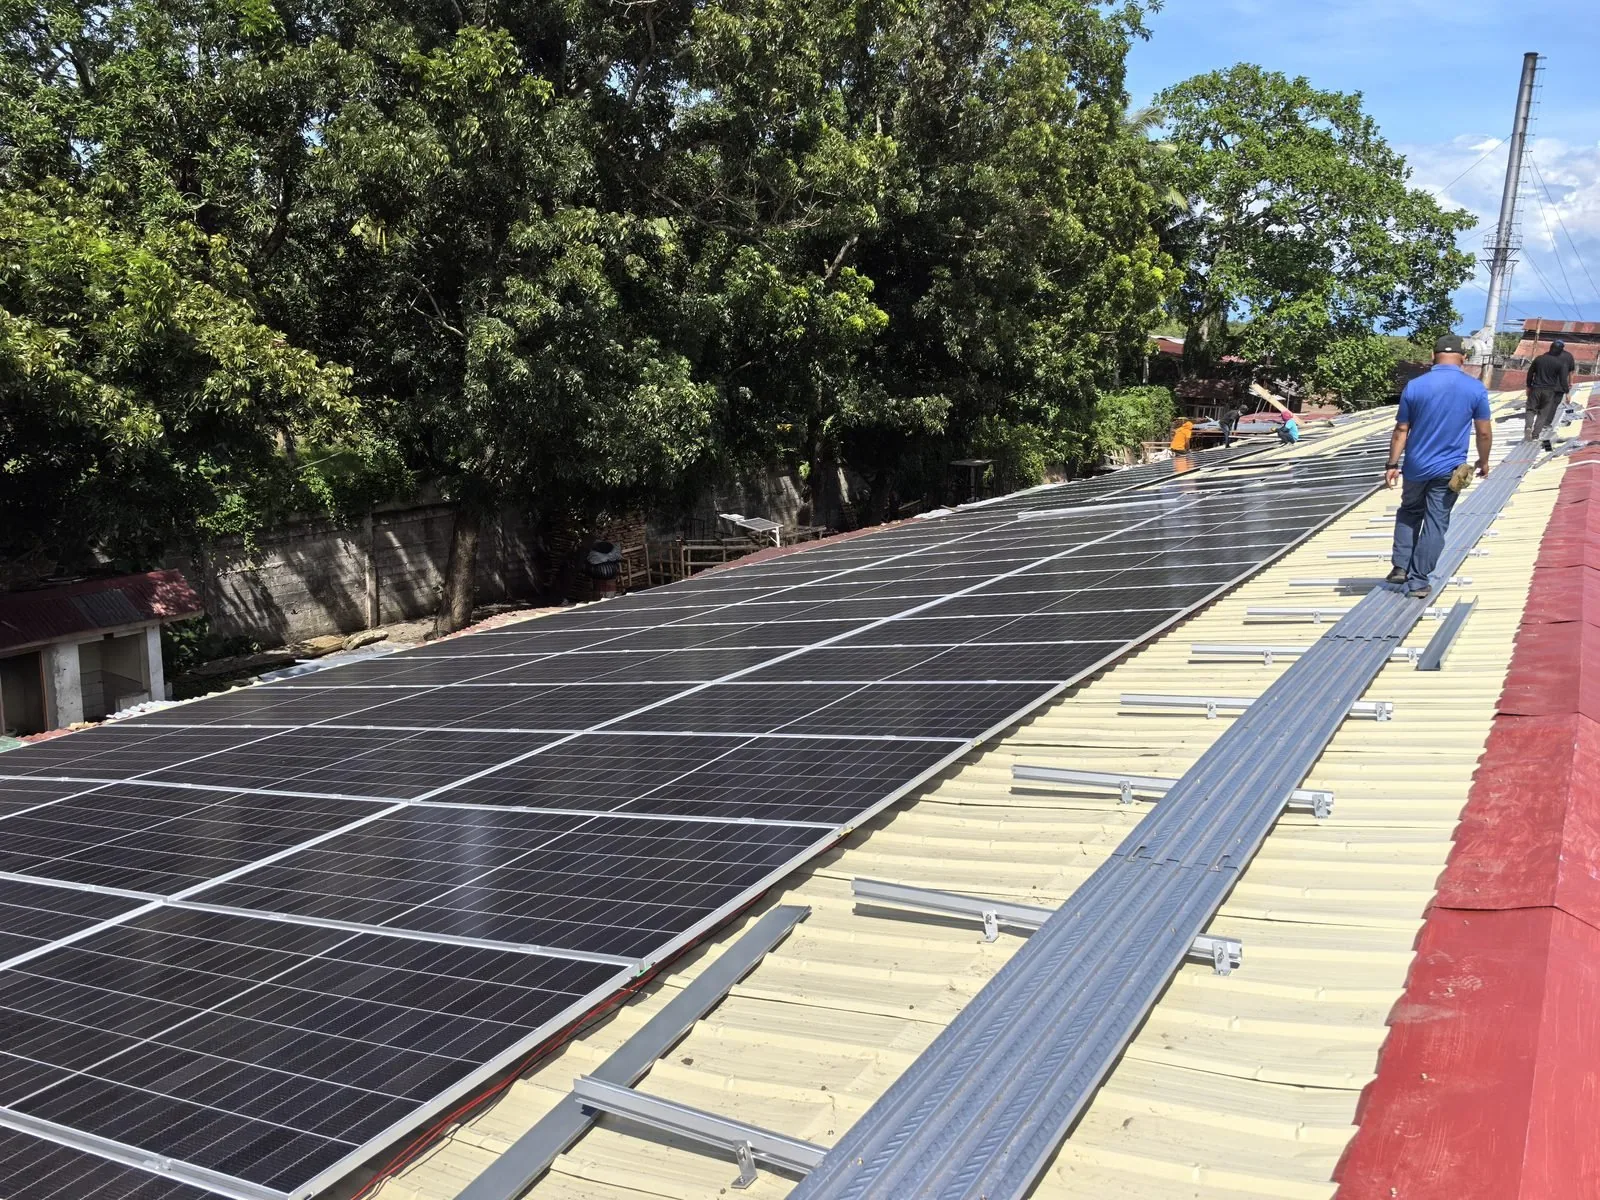
Short answer
A 400 kW rooftop system for a three-shift factory is built in four stages — site survey, mounting substructure, row-by-row panel installation, then commissioning and handover. On this Butuan City build the rails, clamps and maintenance walkway went down before a single panel, and the electrical crew worked in parallel with the roof crew. The order matters more than the speed: survey decisions set the mounting, and the mounting decides whether the array stays serviceable.
A three-shift factory runs on daytime electricity, which makes it a natural fit for rooftop solar. This 400 kW installation in Butuan City, Philippines was configured so that solar generation covers the production load while the grid stays connected as the balancing source.
The sequence below is the same one we follow on every export project: survey first, engineer second, install and commission last. Skipping ahead is how systems end up undersized, miswired or impossible to maintain.
Start with the site survey
Before any hardware is discussed, the roof has to answer practical questions: usable area, orientation, shading from nearby structures, the condition of the metal sheets, and where cables can run from the array to the inverter room.
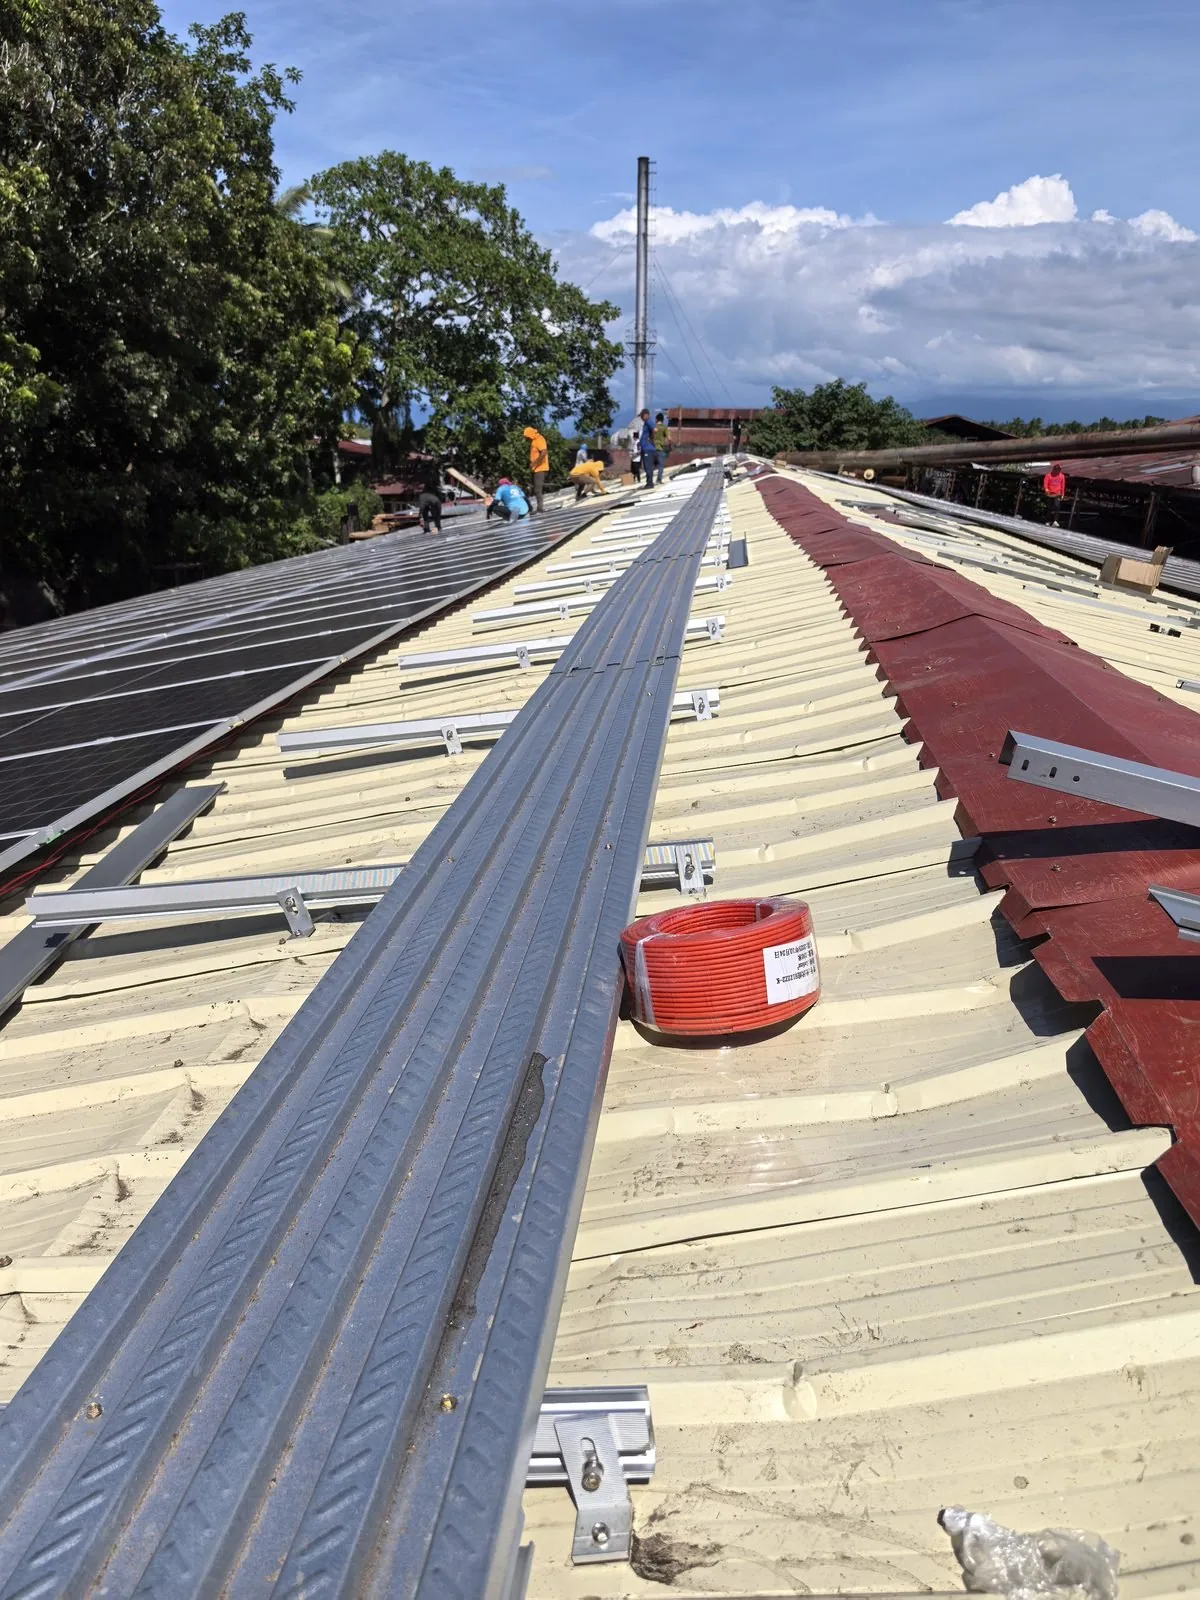
For this factory, the survey also mapped a maintenance walkway. A 400 kW array covers a large area, and without planned access routes, cleaning and inspection become difficult within the first year.
| Stage | What actually happens | What it protects |
|---|---|---|
| Site survey | Usable area, orientation, shading, sheet condition, cable route to the inverter room | Mounting design and planned access routes |
| Layout and mounting | Rails, clamps and walkway installed to the sheet profile and local wind load | Straight rows, accessible clamp points, serviceability |
| Panel installation | Panels lifted, seated, clamped and wired in strings per the engineering drawing | Inverter MPPT windows and expected yield |
| Commissioning and handover | Insulation, polarity and string voltage tests, inverter start-up, monitoring configured | As-built layout, bill of materials, component documentation |
Sequence reflects Force Solar installation records for this project; export orders follow the same order with configuration records and inspection photos before shipment.
Layout and mounting come before panels
Rails, clamps and walkway sections go down first. On a metal roof, the mounting system has to match the sheet profile and the local wind load — this is specified per project, not assumed.
Getting the substructure right is what allows panel installation to move quickly later. Every row is straight, every clamp point is accessible, and the array stays serviceable.
Panel installation, row by row
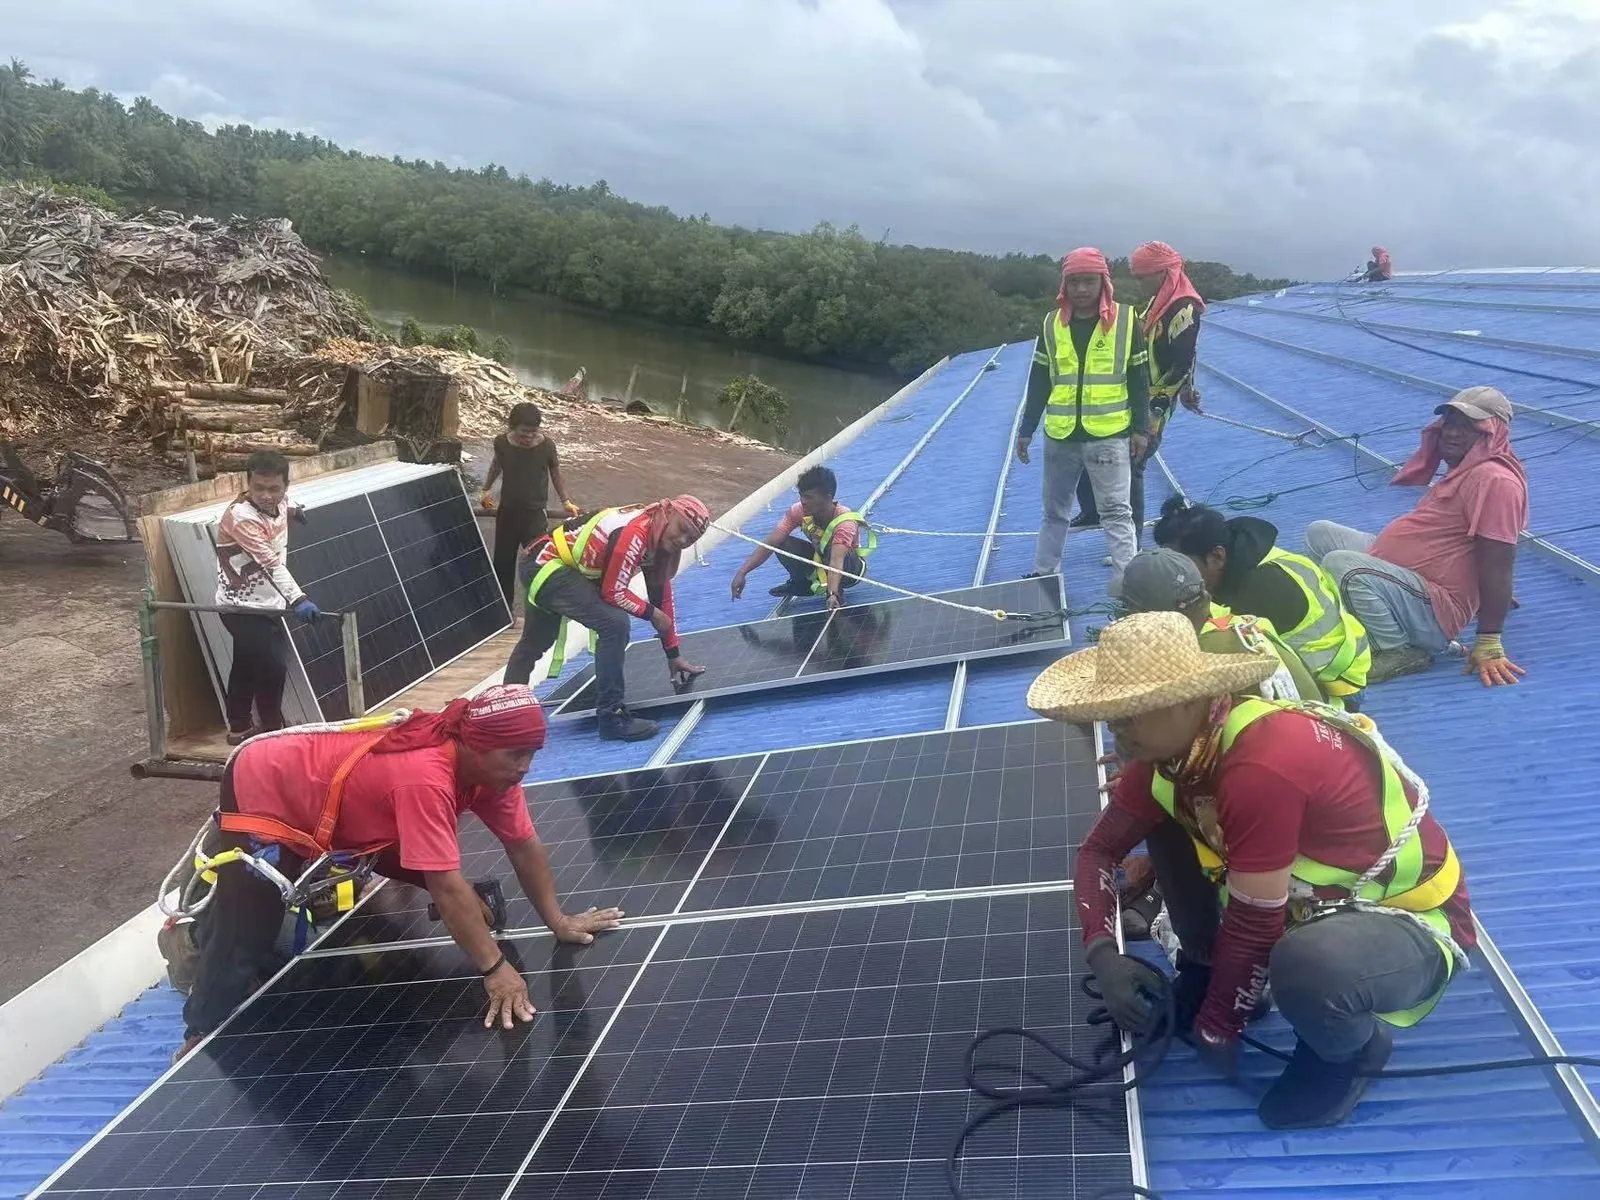
With the mounting complete, crews work row by row: panels are lifted, seated, clamped and connected in strings. On this build the roof crew and the electrical crew worked in parallel — one finishing the array, the other preparing the inverter and protection panels.
String layout follows the engineering drawing exactly, because the inverter MPPT windows were calculated against those string lengths. Improvising on the roof is how yield gets lost.
Commissioning and handover
After electrical tests — insulation, polarity, string voltages, inverter start-up — the system goes live and monitoring is configured. The handover file includes the as-built layout, the bill of materials and the documentation for each major component.
For export projects, the same discipline applies before shipment: configuration records, inspection photos and packing lists travel with the order.
Photographs from Force Solar installation records. Figures describe the referenced project configuration; every new system is sized against its own load data.